How to Set Up Automated Order Refund Messages in ZEPIC Flows
This guide covers how to build an automated order refund journey in ZEPIC, so every customer hears back the moment their refund is issued. Order refund journeys in ZEPIC are designed to help e-commerce, D2C, and travel brands close the loop instantly, across SMS, WhatsApp, and email.
This adds a lot of convenience since team members do not need to send them one at a time.
Table of Contents
- • Before You Begin (Prerequisites)
- • What Is an Order Refund Journey?
- • How to Build an Order Refund Journey in ZEPIC
- • What to Expect After Launch
- • Order Refund Use Cases for Your Business
- • FAQs
- • Explore Related Articles
Before You Begin
- • An active ZEPIC account with at least one channel enabled, such as SMS, WhatsApp, or email.
- • Your Shopify store connected to ZEPIC, or another source sending order data through a webhook.
- • Order Refund tracked as a custom event flowing into ZEPIC.
- • A refund message ready for each channel you plan to use.
What Is an Order Refund Journey?
An order refund journey is a flow in ZEPIC that starts the moment a refund is issued, so the customer hears back without anyone needing to send the message manually.
You can send the order refund message or messages you have customized for SMS, WhatsApp, or email using your Shopify integration or a Webhook. This also allows you to send the refund message on multiple channels at once, or add a delay if needed.
How to Build an Order Refund Journey in ZEPIC
1. Connect Your Order Source: Connect your Shopify store integration or any e-commerce platform to ZEPIC using webhooks to send order data as it happens (If not done already).
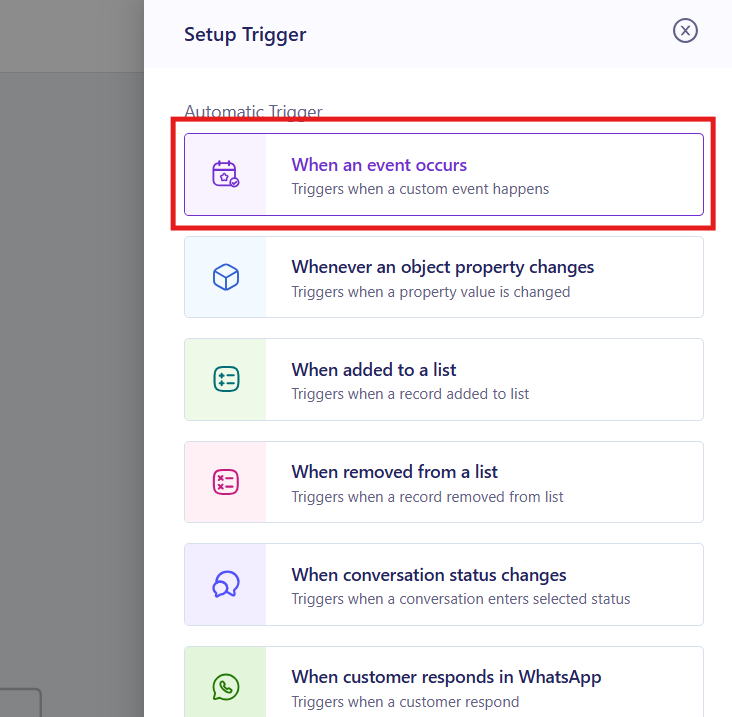
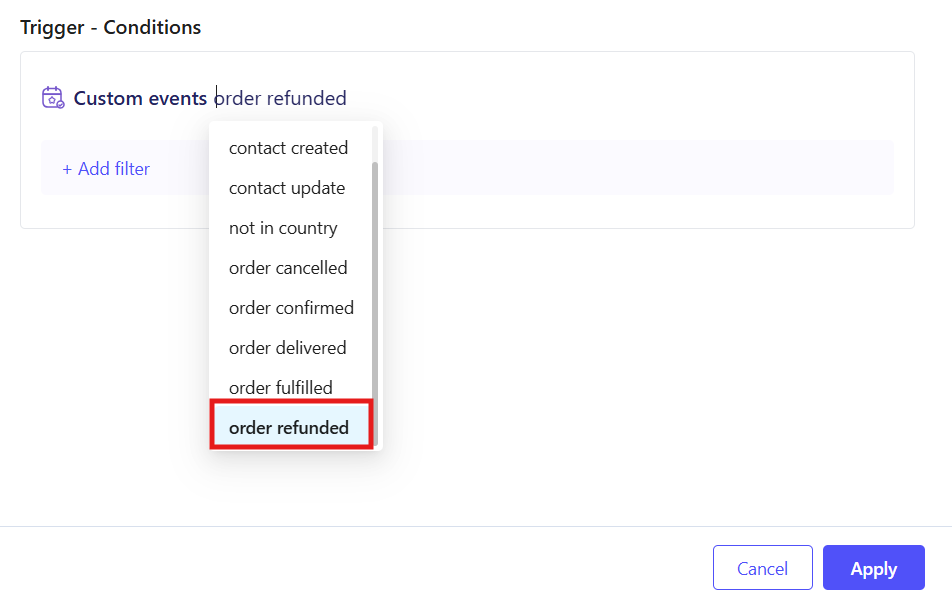
2. Open Flows and Set the Trigger: Navigate to Flows in the ZEPIC console, create a new flow, and set the trigger as a custom event. After this, select Order Refund on your platform.
3. Customize Your Messages: Add a step for each channel you want to use, SMS, WhatsApp, or email, and customize the message with the refund amount and personalization such as first name.
4. Choose Timing Across Channels: Send the refund message on multiple platforms at once, or add a delay between channels if you want one message to follow the other.
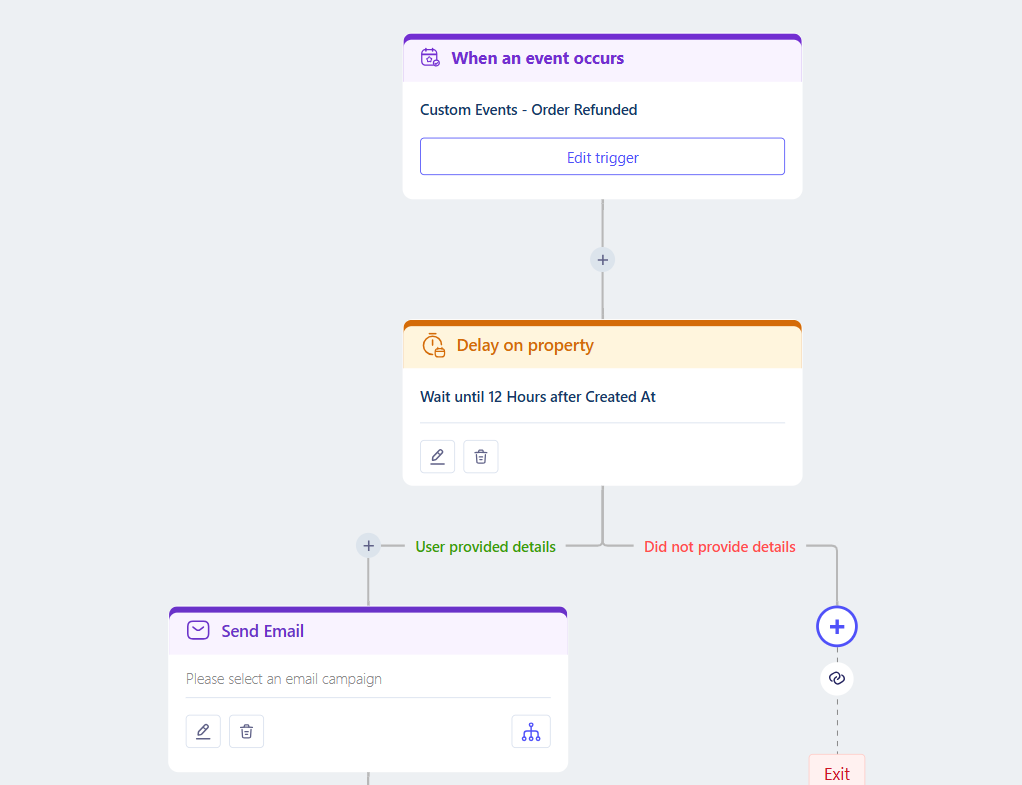
5. Test and Launch: Trigger a test refund, confirm each message arrives correctly, then publish the flow to your live audience.
What to Expect After Launch
Once your order refund journey is live, your business can close the loop with every customer the moment a refund is processed.
Your team does not need to send refund updates manually or check each case one at a time.
This means every customer gets a timely message on the channel they prefer (or you opt for), while delivery tracking shows how each one performed.
Order Refund Use Cases for Your Business
- • Instant Multi-Channel Confirmation: A D2C skincare brand sends an SMS and a WhatsApp message at the same moment a refund is issued, so the customer sees it wherever they check first.
- • Email as the Detailed Record: A fashion retailer sends an SMS confirmation immediately, then follows with a detailed email receipt a few minutes later showing the refund amount and timeline.
- • Refund Confirmations for Travel: A travel agency confirms a cancelled booking refund by WhatsApp right away, then delays an email with the full credit breakdown until the refund is finalized.
- • Channel Based on Refund Value: An electronics retailer sends a standard email confirmation for most refunds, but adds an instant SMS for higher-value refunds that deserve a faster reassurance.
FAQs
Can I send the refund message on more than one channel at once?
Yes. You can send SMS, WhatsApp, and email together the moment the refund is issued, or add a delay so one channel follows another.
Does this only work with Shopify?
No. Shopify is the most common source, but the same flow can trigger from any other webhook that sends an Order Refund event into ZEPIC.
Do I need coding experience to build this journey?
No. ZEPIC uses a visual Flow builder, so you can set the trigger, customize messages, and add delays without writing code.
Explore Related Articles
Was this article helpful?
That’s Great!
Thank you for your feedback
Sorry! We couldn't be helpful
Thank you for your feedback
Feedback sent
We appreciate your effort and will try to fix the article