How to Register Your WhatsApp Number in ZEPIC
Connecting your WhatsApp number to ZEPIC allows you to move from a limited personal messaging platform to a more capable platform for both reach and performance.
In doing this, you can handle high-volume campaigns, automation, and reporting that’s a lot more personalized. But, to start, you’ll need to link your account securely to Meta (Facebook) and register a dedicated number for the WhatsApp Business API (WABA).
Here’s how the setup can be initiated right within ZEPIC, which guides you through Meta's secure, official flow.
Pre-Setup Checklist
Ensure you have the following ready before starting the connection process:
- Dedicated Phone Number: The number must be active, able to receive an SMS or call, and not linked to any personal WhatsApp or existing WABA account.
- Meta Business Verification: You must have admin access or access to create a new WABA on the Meta Business Manager.
- Official Business Website: Your website is Meta's primary tool for cross-checking legitimacy. It must be live and professional, contain a clear business description, and crucially, have contact information (Name, Address, Phone) that precisely matches the details submitted to Meta
Follow these steps to link your Meta accounts and register your new WABA number.
This document will use a brand named PapaEarth, a ZEPIC customer. Each ZEPIC customer receives a dedicated domain to access their account, e.g., https://papaearth.myzepic.com.

Step-by-Step Connection Guide
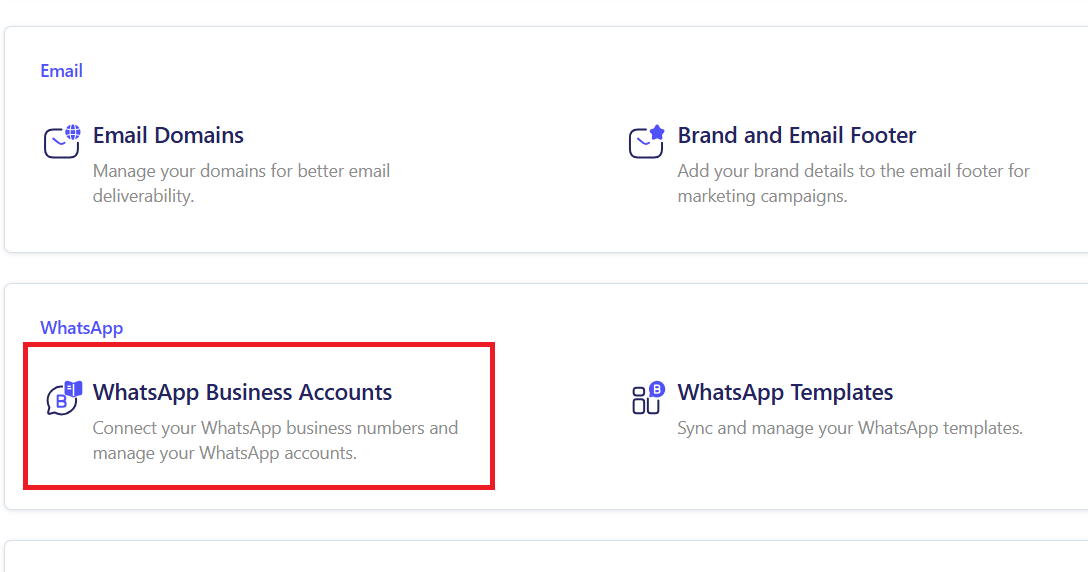
Start in ZEPIC: Navigate to Settings > WhatsApp > WhatsApp Business Accounts in your ZEPIC dashboard.
Go to WhatsApp Business Account Settings: Navigate to WhatsApp Settings.

Connect Your WhatsApp Account: Click the “Connect your WhatsApp Account” button.

360Dialog Popup: A 360Dialog popup will appear (360Dialog is our WhatsApp BSP partner). Fill in the details:

Choose “No; this number is not connected to WhatsApp Business API.”

Choose “No”

Click “Start Embedded Signup”

Meta Business Account: You can choose your existing Meta Business Account from the dropdown or create a new one. It’s recommended that you choose an existing account.

Create a WhatsApp Business Account: Provide the necessary details carefully.

Create WhatsApp Business Profile: Add publicly viewable information about your company.

Enter WhatsApp Mobile Number: Enter and verify the mobile number by entering the OTP received.

Completion: You will be redirected to a Thank-You page. Wait for the pop-up to close, then click “Refresh” to see the WABA account.

Final Confirmation: Once the number is successfully verified, you will be redirected back to ZEPIC. Your new WhatsApp sender will appear as Active and ready to use for campaigns and automation.
What to Do After Connection
Once your number is connected and active in ZEPIC, you are ready to begin messaging!
- Test the Connection: Send a test message or launch a small internal campaign to confirm deliverability.
- Review Templates: You must create and get approval for Message Templates (HSMs) before initiating outbound conversations with customers.
- Apply for Blue Tick: If you are a notable brand, you can now apply for the Official Business Account (Blue Tick) through the Meta Business Manager. We go over how you can do this in our Meta verification article.
Was this article helpful?
That’s Great!
Thank you for your feedback
Sorry! We couldn't be helpful
Thank you for your feedback
Feedback sent
We appreciate your effort and will try to fix the article